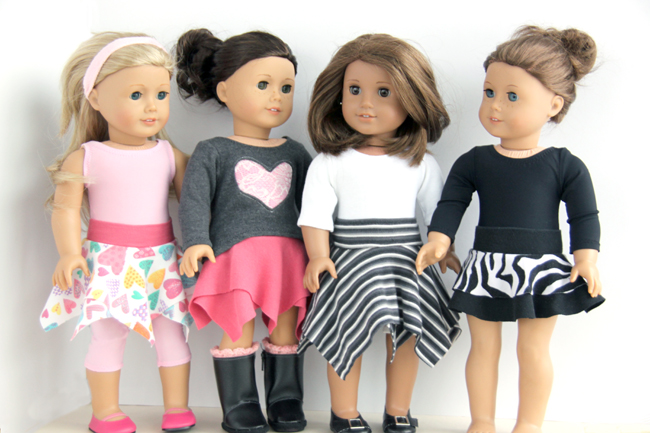
Upcycle a knit shirt into a cute pull-on skirt for your 18-inch doll!
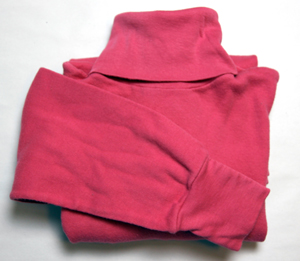
This little skirt goes together really quickly and is fun to make, so don’t be surprised if you find yourself stitching up a whole pile of them! All you need is a knit shirt (or other knit garment) large enough you can cut two 9-inch squares of fabric from them, plus a cuff that will fit around your doll’s waist and hold its shape when stretched.
There are no edges to finish, no fasteners to put in and just a tiny bit of stitching, making this project easy enough for the beginning seamstress, but so cute no one will ever know how simple it was!
Grab your doll, hit the thrift shop and have fun adding to your wardrobe! This pattern as written fits 18-inch dolls, such as American Girl™, but could be easily adjusted to fit just about any size doll.
How to Make a Doll Skirt from a Knit Shirt
Supplies Needed
• One adult-size long-sleeved knit shirt which:
– Is made of non-fraying knit fabric,
– Has a ribbed knit cuff OR a sleeve made of knit that holds its shape well when stretched and fits your doll’s waist, and
– Can be cut to provide two pieces of seamless fabric at least 9-by-9 inches in size.
• Thread
• Freezer paper
Tools Needed
• Sewing machine
• Fabric scissors
• Ruler (a clear quilting ruler works great!)
• Sewing pins
• Iron & ironing board
• Rotary cutter & self-healing mat (optional)
• 3-inch diameter circle template (try a drinking glass, small lid, small bowl, coffee cup … or use a compass or computer to draw one)
• X-acto knife or blade (optional)
Instructions
1. Remove both sleeves from your shirt by carefully cutting through both layers where the seam connects each sleeve to the body of the shirt. 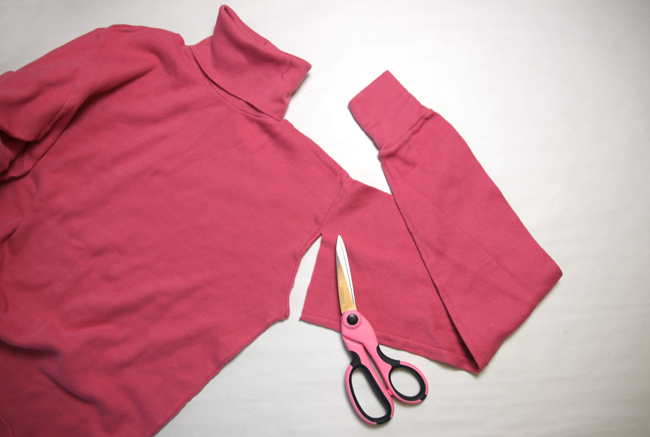
2. If your sleeves have cuffs, carefully cut a 1 1/2- inch strip from the end of each sleeve. This will create two bands. (Only one band is needed per skirt, but you will most likely have enough fabric to make two skirts, if you desire.)
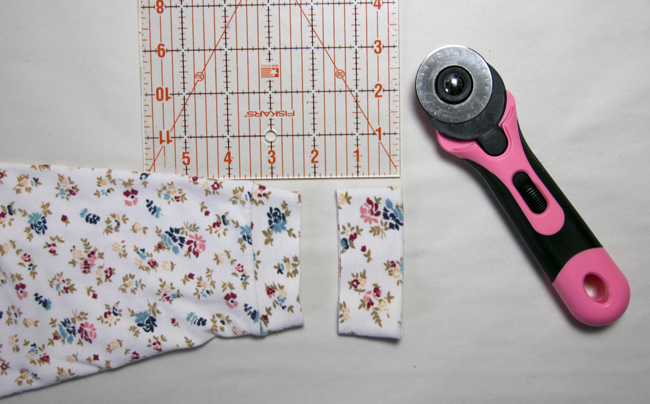
If your sleeves DO NOT have cuffs, simply measure 1 1/2 inches from the end of one of each sleeve and cut so that you have a band from each. Set bands aside.

3. Open up each sleeve by cutting along the seam from cuff to shoulder. 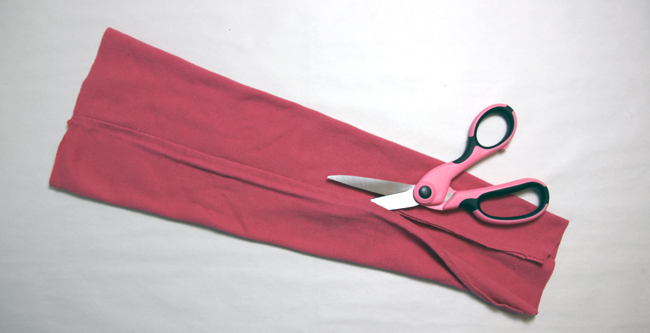
4. Stack the two sleeves on top of one another so that you have two layers of fabric of approximately the same size and shape. 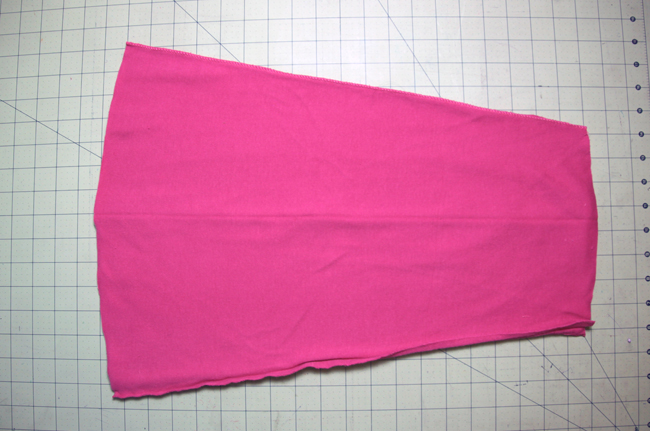
5.Cut two 9-by-9-inch squares by cutting through both layers of fabric. TIP: A clear quilting ruler and rotary cutter are very helpful for this step. 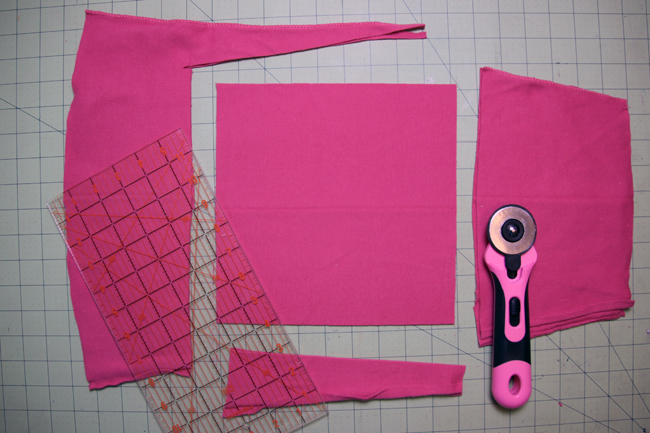
6. Cut a 3-inch diameter circle from freezer paper by placing a lid, bowl, glass or other container of the correct size on the freezer paper, then cutting around the edge with an X-acto knife. (You could instead trace the circle, then cut it out with scissors.) 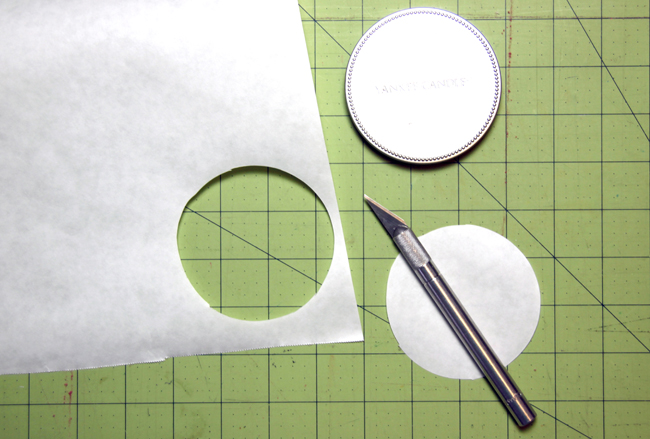
7. Lay one of your squares of fabric on the table, right side up. Place the paper circle in the direct center of the square so that the shiny side of the paper is facing down against the fabric. Using a warm (not hot) iron, iron the paper to the fabric. (The circle will serve as a removable stitching guide in a later step.) Using fabric circles? The smaller fabric circle should be used for this step. 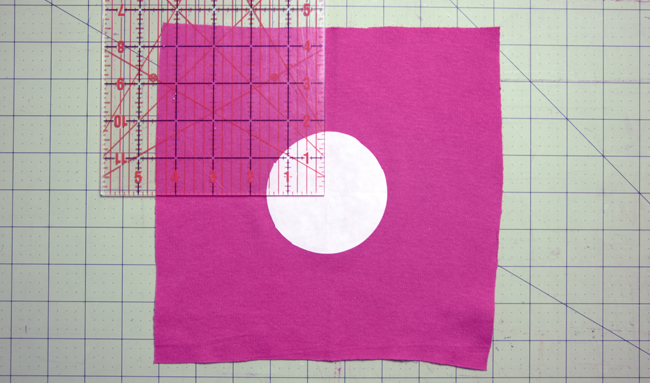
8. Stack the squares of fabric so that both are right side up, edges are even and the square with the paper circle is on top. Turn the top square 45 degrees so that the points of the top square line up evenly between the points of the square below. Pin the two layers together along the inside edges of the paper circle. 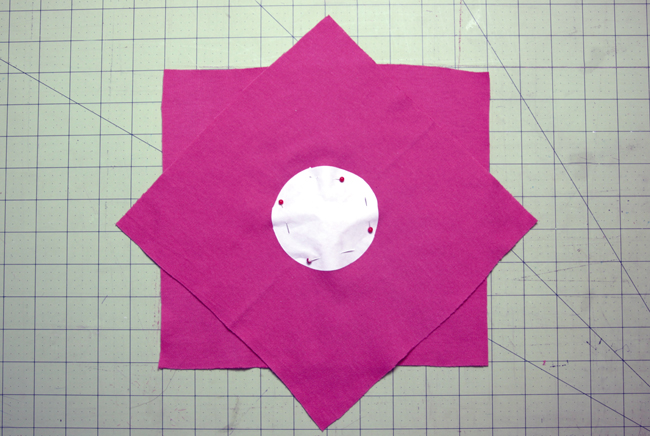
9. Stitch around the edge of the circle. (Don’t worry if you happen to stitch a bit on the paper.) 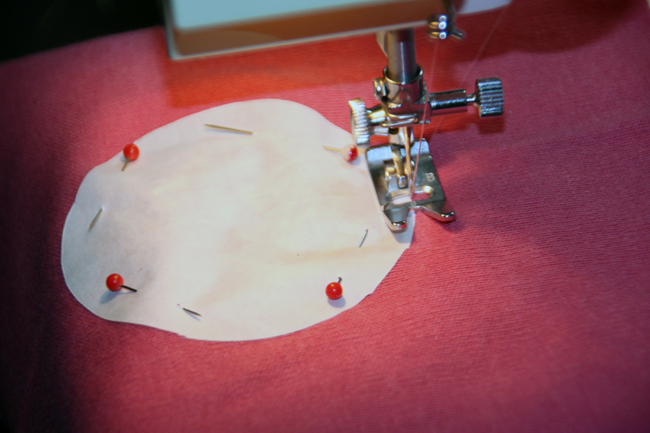
0. Peel the paper from the fabric. (If you stitched a bit on the paper, simply pick away any paper that got caught your threads.) 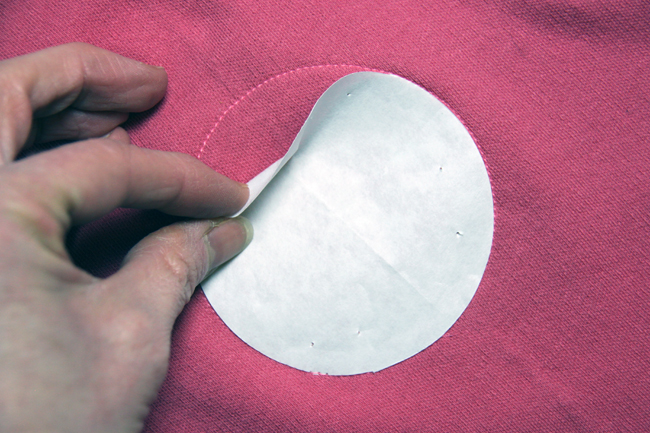
11. Fold the layers in half and make a small cut in the center of the circle. (This makes it easier to start cutting in the next step.) 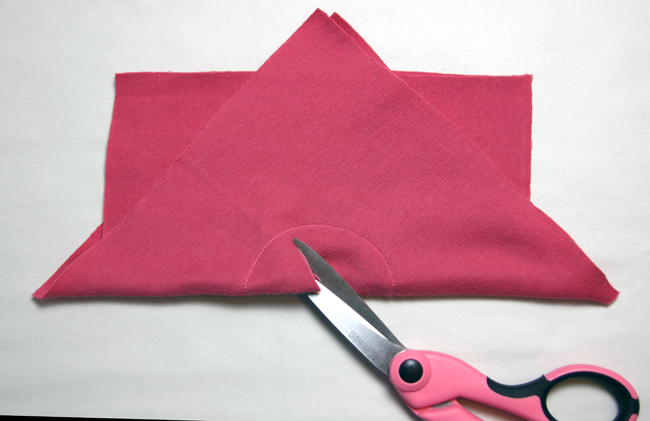
12. Using sharp sewing scissors, carefully trim out the center of the circle. Cut as close to the stitch line as possible without cutting into the stitching. 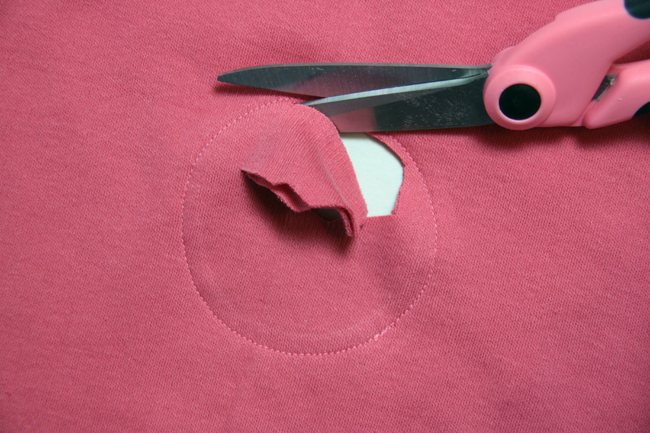
13. Place one of the bands you cut earlier on the table so that the folded side is down and the raw edges are visible on top. (If your cuff has a right and a wrong side, such as a hem on just one side, make sure the wrong side is on the inside of the ring at this stage.) Place four pins evenly around the edges, starting at top of the cuff seam, then placing one directly opposite, then adding a pin in the center of each remaining space. 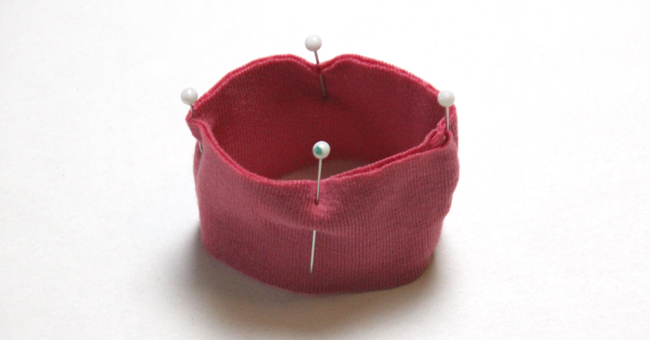
14. Place the fabric squares on the table so that the right sides are facing down and the band is sitting in the center opening. The pins in the band should be aligned with the four corners of fabric peeking out from the bottom square. Using the pins as placement guides, pin the band to the fabric squares, removing each pin one at a time and using it to pin the band to the fabric at that point. 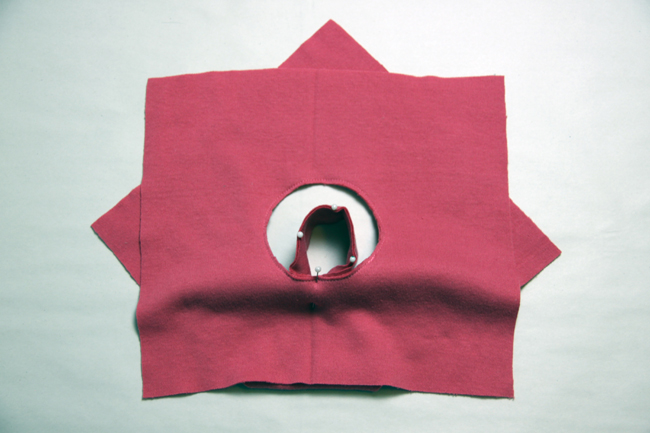
15. Pin the four corners first, as shown. 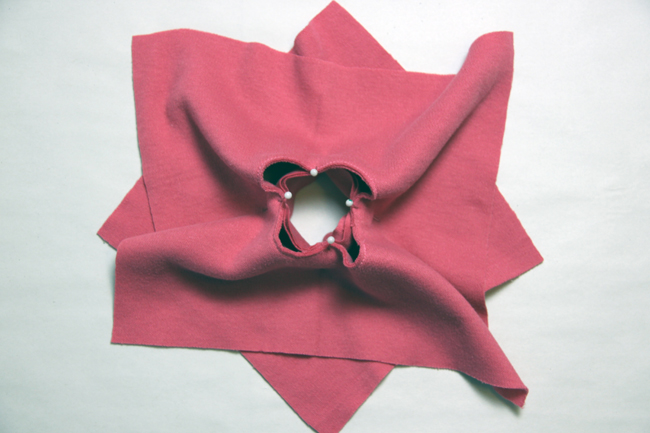
16. Add additional pins between the four original ones until the entire circle has been pinned, stretching the band fabric as needed to match layers together. 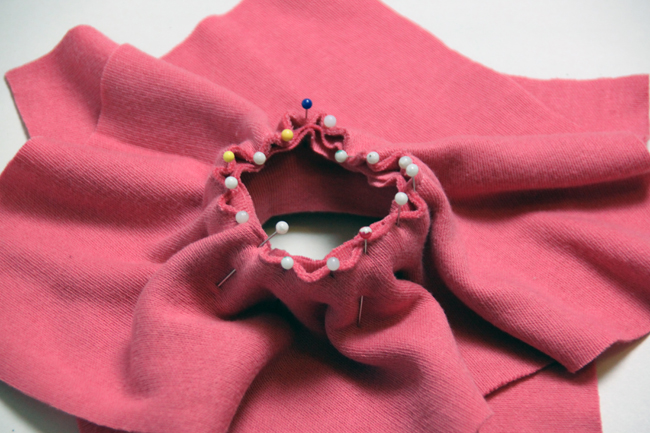
17. Remove your sewing machine table so that you have a free arm. Slide the skirt onto the arm, as shown. (The fabric will be snug but should be movable.) Using a wide zigzag stitch, stitch the skirt to the band, guiding the skirt around the arm and removing pins as you go. 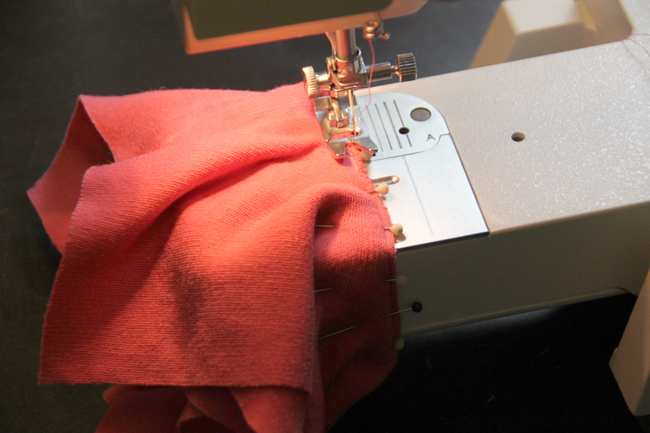
18. Remove the skirt from the sewing machine. Clip threads. 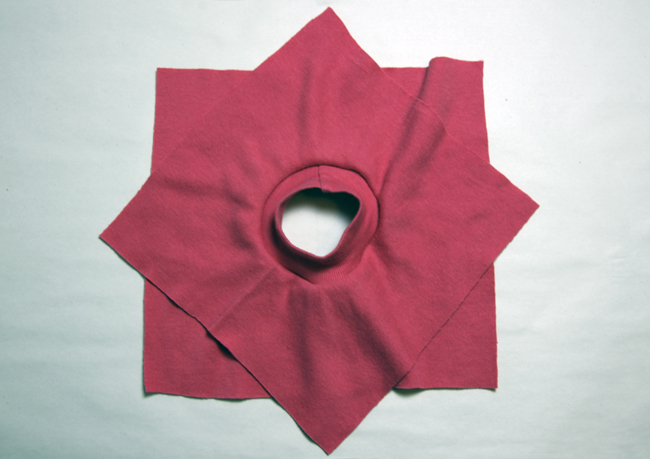

Permission to Get Creative
This tutorial was written for use with an adult-size knit shirt, but just about any knit fabric will work as long as it does not fray and isn’t too bulky to drape nicely when worn by your doll. Try mixing and matching colors and patterns, recycling cuffs from a variety of shirts, or even purchasing new fabric for this project.
Have your heart set on a fabric that does ravel? You may be able to use it successfully as long as you finish the edges of the square prior to attaching the waistband. Finishing options include cutting with pinking shears, zigzagging the edges or stitching a narrow hem.
Matilda’s Closet is not affiliated with American Girl® or Mattel®. No endorsement is implied.
0 Comments