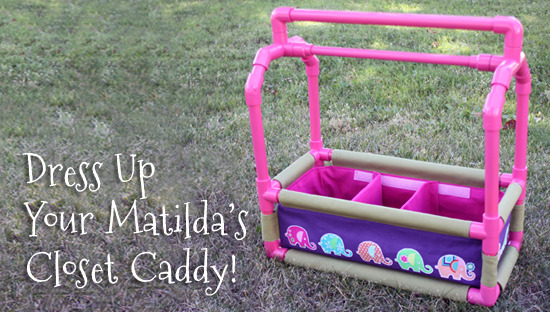
Dress up your Matilda’s Closet Caddy with this quick and easy no-sew applique technique!
Dress Up Your Matilda’s Closet Caddy
Supplies Needed
• Fabric
• No-sew iron-on adhesive (such as Heat n’ Bond UltraHold)
Tools Needed
• Sharp scissors
• Iron & ironing board
Instructions
This tutorial will explain how to add no-sew applique embellishments to our Matilda’s Closet Caddy PVC project available in our shop.
1. In addition to the fabrics used in the Matilda’s Closet Caddy construction, choose a fabric to use for your appliques. The best choices have fairly simple, easy to cut-out images that do not overlap, such as those shown here. 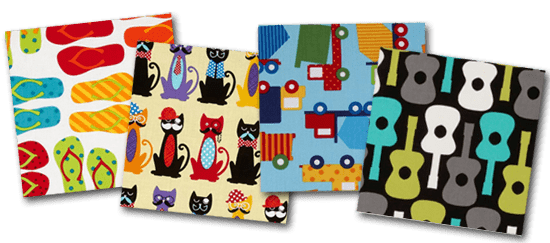
2. Following manufacturer’s instructions, apply no-sew iron-on adhesive to the wrong side of your applique fabric. 
3. Using very sharp scissors, cut out the images you wish to use for your applique. For best results, try leaving a thin border around your entire image, rather than cutting directly on the edge of your image. 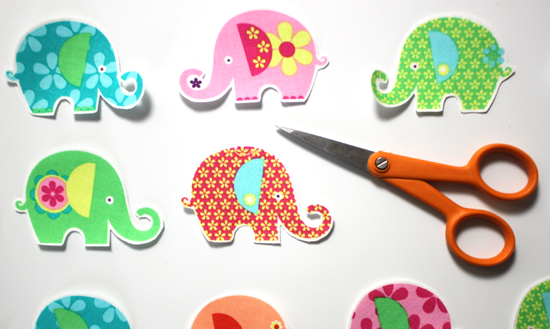
4. Peel the paper backing from your applique images and position the images on the right side of the fabric pieces where you want the appliques to appear. In our example, we added the elephant appliques to both LONG SIDE and SHORT SIDE pieces (main fabric only, not the lining) of our Closet Caddy. TIP: Try using a clear quilting ruler to help with placement, keeping in mind the 1/4-inch seam allowance on all sides. 
5. Following manufacturer’s instructions, adhere your images to your fabric with your iron. Allow to cool before proceeding. (Because you are using no-sew adhesive, there is no need to stitch the appliques to the fabric!) 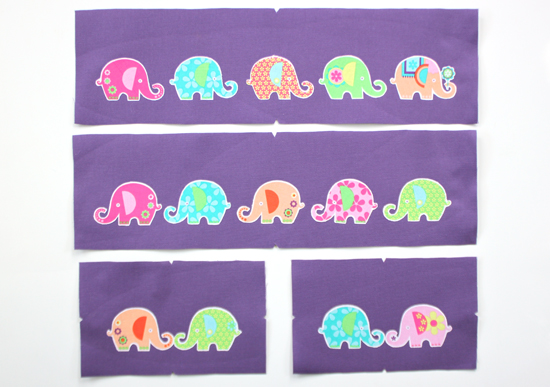
6. Follow the Matilda’s Closet Caddy assembly instructions as written. When it is time to attach the LONG SIDE and SHORT SIDE pieces to the BOTTOM (Steps 24-28), make sure your applique images are oriented in the correct direction, as shown here. 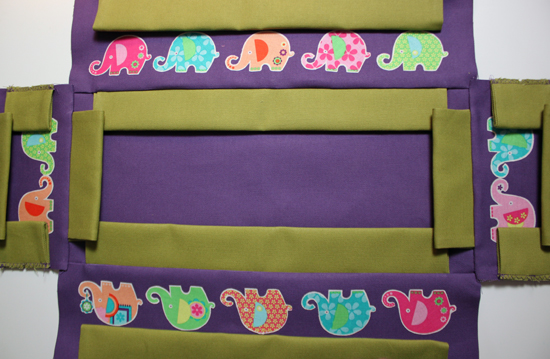
That’s all there is to it! Have fun embellishing your Closet Caddy!

Matilda’s Closet and AptOne8 are not affiliated with American Girl® or Mattel®. No endorsement is implied.
0 Comments