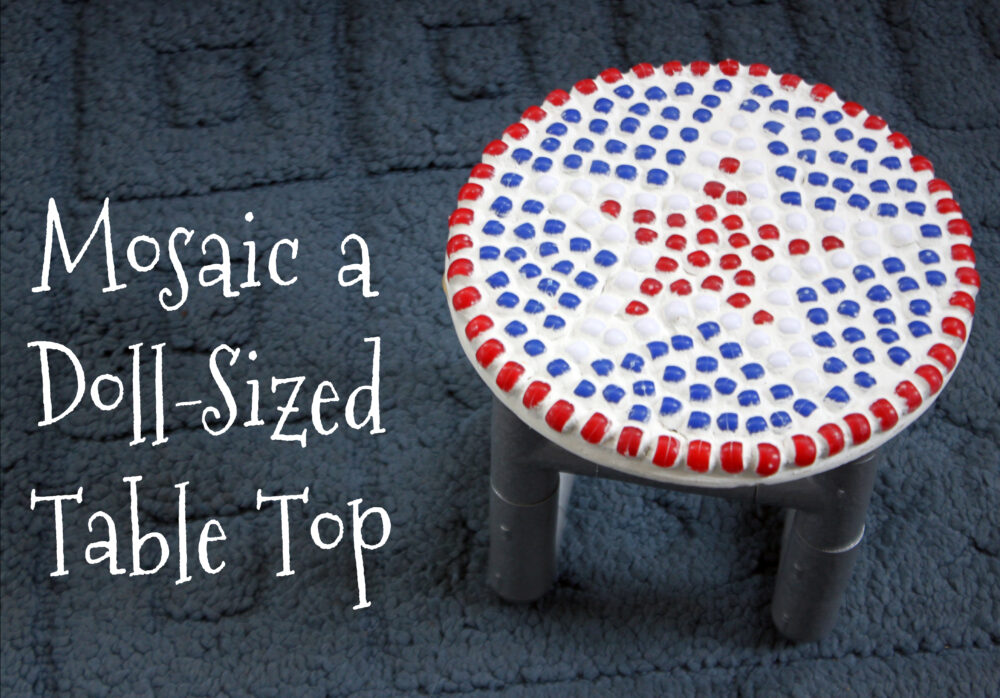
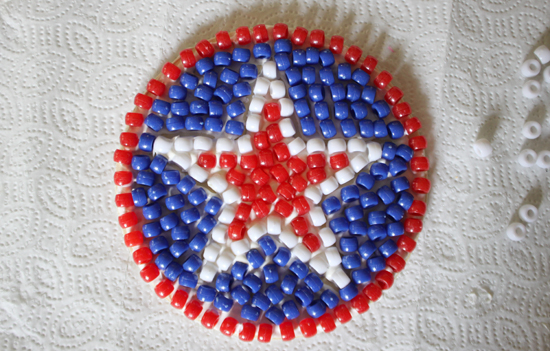
Add a playful star design to your doll’s Side Table with this easy mosaic technique!
How to Mosaic a Doll-Sized Table Top
Tools & Supplies Needed
• Plastic notched spreader
• Wooden popsicle sticks
• Rubber gloves
•Sponge
• Small container (disposable)
• Liquid measuring cup
• Plastic garbage bag or other surface protector
• Paper towels
Materials Needed
• 9mm plastic pony beads – red, white and blue
• Tile adhesive (such as Henry ReadySet Premixed Mastic Adhesive or Mosaic Mercantile Mosaic Tile Adhesive)
• Grout (such as White Dry Non-Sanded Grout)
• Water
• Optional – acrylic crafters paint to color to the grout
Tips before you begin…
• This tutorial was designed to complement the AptOne8 Sleeper Chair Plus Bonus Side Table pattern.
• Read through all of the instructions so you know what to expect.
• Make sure you allot enough uninterrupted time for each step so you can finish before the materials harden. Keep in mind this is a two-step process which typically requires as least a couple days to complete.
• Read and follow manufacturer’s instructions for the specific materials you choose to use, including following all safety precautions.
Instructions
Part One – Attach Your Mosaic Pieces
1. Click HERE to download the free AptOne8 Table Top Star Mosaic Template (PDF). Print on 8.5×11-inch paper. Cut out the circle, then carefully cut out the star in the middle. 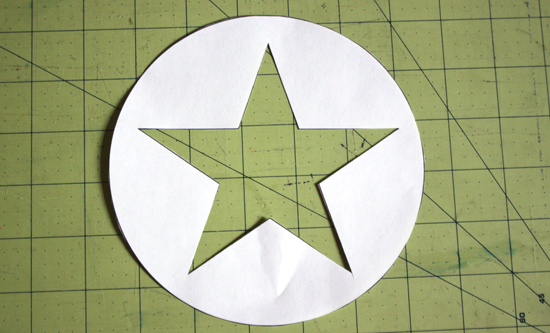
2. Lay the template over your wooden tabletop piece. Spread tile adhesive evenly over the exposed wood inside the opening of the star. 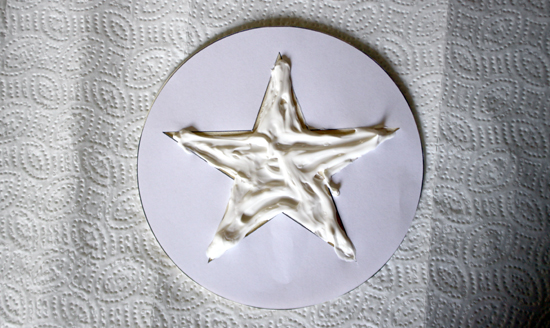
3. Place white pony beads into the adhesive along the outer edge of the star to create an outline, leaving a small space (1/8 inch or less) between each bead where the grout will later fill in. TIP: Place all beads with the opening to the side for a more polished look. 
4. Carefully remove the paper template, replacing any beads dislodged in the process. Fill in the center of the star with red beads, making sure you continue to leave a small space around each bead for the grout. One section at a time, apply adhesive and beads to fill in the rest of the design. TIP: Place red beads along the border of each section first, then fill that section in with blue beads. 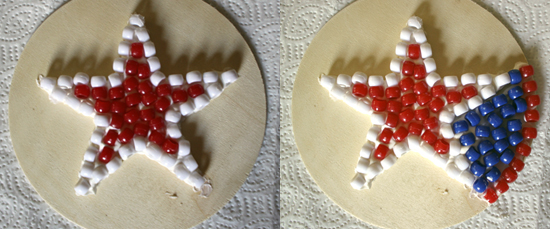
5. Allow your design to dry and “cure” completely, according to your adhesive’s instructions. Typically this requires at least 24-36 hours, though some adhesives require much less time.
Part Two – Grout Your Table Top
1. Assemble your tools and materials near a water supply, such as the kitchen sink. Cover your countertop or any nearby areas with plastic to protect the surface. For this section, you will need rubber gloves, popsicle sticks, a plastic spreader and sponges, in addition to a disposable container, liquid measuring cup and paper towels for cleanup. 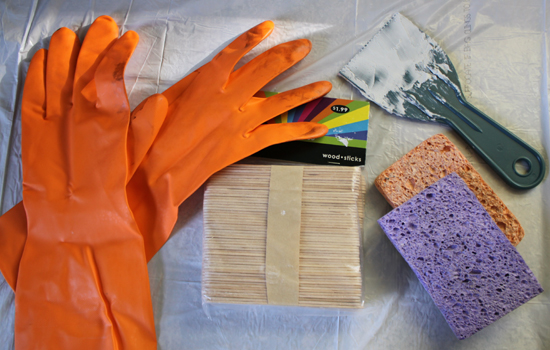
2. In a disposable container, use a popsicle stick to mix a small amount of grout with the amount of cool water indicated by the grout manufacturer to create a thick paste, about the consistency of oatmeal. 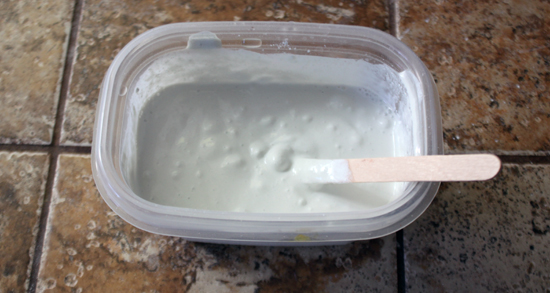
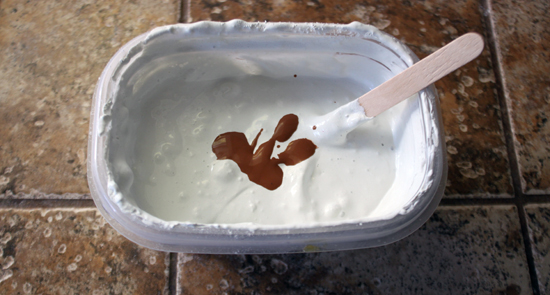
TIP: Prefer colored grout? Options include buying it pre-colored or adding acrylic paint to your mixture a little at a time. Stir, check the color, and add more paint if needed until your grout is the color you desire. You may want to start with thicker grout than normal as the paint tends to water it down a bit, depending upon how much you use.
3. Wearing rubber gloves and using a plastic spreader, begin spreading grout over the beads on your table top, using the spreader (or your fingers) to work the grout down in between the beads. 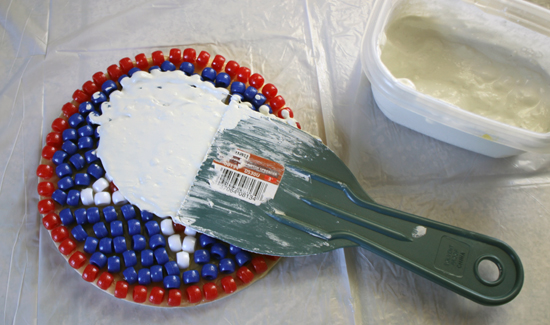
4. Continue adding and spreading grout until the enter table top is covered, including the sides. Take care not to get too much grout on the underside of the table. (If some grout does get on the underside, it can usually be removed by lightly sanding after it dries.) 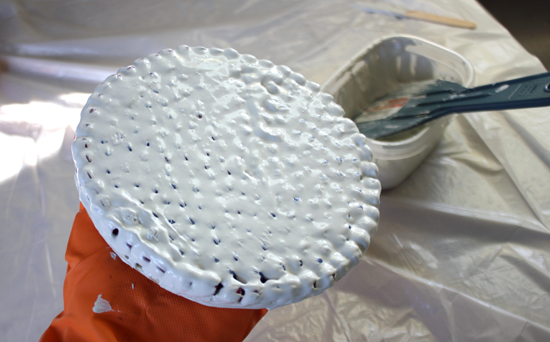
5. Using your fingers or a sponge which has been dampened and then squeezed nearly dry, remove the excess grout. Take care not to dig the grout from between the beads or to remove too much grout – you should be able to see the beads but there should be a thin layer of grout still covering them. 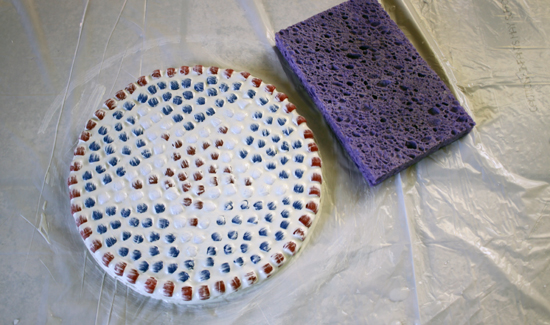
6. Allow the grout to set until fairly firm – at least 30 minutes but possibly a bit longer, depending upon how wet it was to begin with. Once the grout is firm (but not hard) to the touch, wet your sponge and squeeze most of the water out. Use the sponge to gently wipe the beads to remove the grout that covers the top of each bead. Take care not to dig in between the beads. 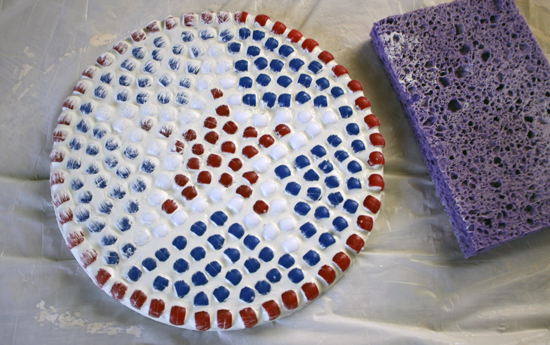
Don’t forget to clean off the sides, too!
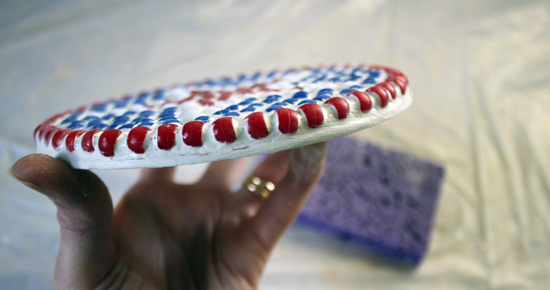
7. Allow the grout to harden further, typically at least a few hours. If there is still a light film on the beads, use a soft cloth to clean off each bead. Allow the grout to dry until hard, typically at least overnight, before proceeding. 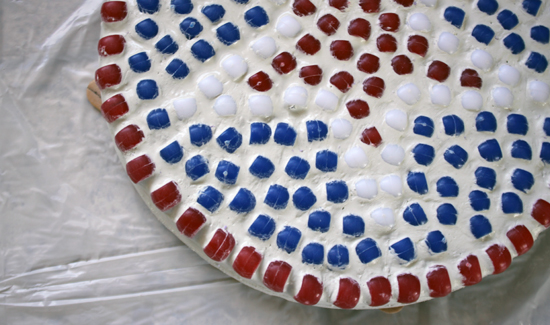
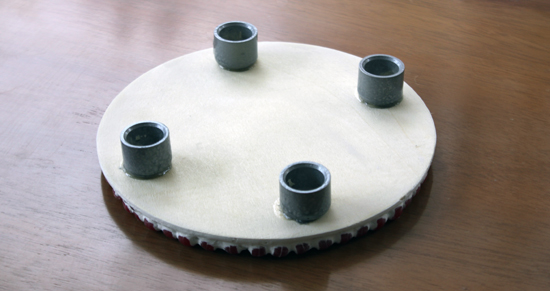
8. Attach your table top to its frame as described in the Side Table instructions. If you plan to spray paint your frame, we recommend gluing and painting the frame without the END CAPS attached. Use a piece of masking table to cover the area where the END CAPS are joined to prevent those areas from getting paint on them. 
8. Paint the END CAPS separately. Once the frame and caps are dry, attach the caps to the frame and proceed as instructed to attach the table top. 
The added benefit of constructing your table in this way is that the table top will be removable, which means you can use the same frame for different tops!
Permission to Get Creative…
Try using a variety of materials in place of the beads for your mosaic design, such as buttons, broken pottery, leftover tiles, shells, flat glass marbles or other small items. Your options are limited only by your imagination!


Need some other furniture to go with your fancy new table? Check out our AptOne8 PVC doll furniture plans…


Matilda’s Closet and AptOne8 are not affiliated with American Girl® or Mattel®. No endorsement is implied.
Great tutorial! I think that you forgot to put the wooden table top piece in the supply list. I love all your patterns, especially the PVC and CPVC ones. Do you think this would work with melted beads? I saw something that looks like this on doll stuff by Jana with melted beads and glass stones. I just bought your lounge chair pattern. Thank you very much for the towel pattern. I plan on making them both soon.
Thanks Diane! The supply list only includes items needed for a mosaic that aren’t already listed on the table pattern, since this tutorial is designed to complement that. But thanks for mentioning it… it wouldn’t surprise me if I forgot something from time to time! I’m not sure about melted beads but I’d love to see it if you try! Thanks for the comment … and happy crafting! 🙂