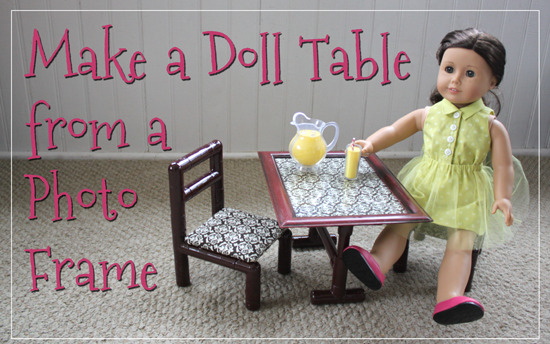
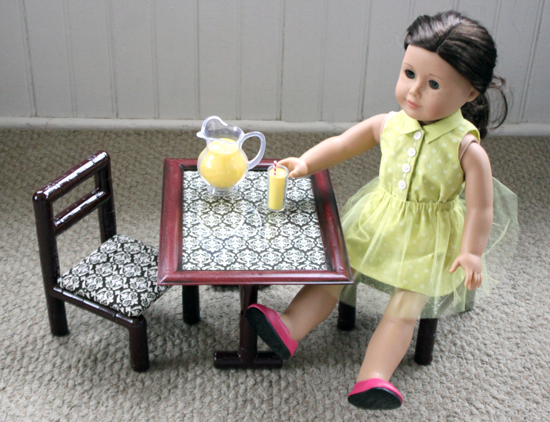
Need a fun and easy-to-make table to go with your No-Sew Side Chairs? Here it is! Convert an inexpensive photo frame into the perfect table, complete with a versatile table top that you can customize to match your chairs.
How to Make a Doll-Sized Table from a Photo Frame
Materials Needed
• One (1) 8×10, 8.5×11 or 11×14-inch photo frame with removable cardboard or chipboard back (TIP: Frames that are fairly flat with a plastic, not glass, front work best and are safest for use by children.)
• Fabric (size depends on frame size; for example, 8×10 inches for a frame made to fit 8×10 photos)
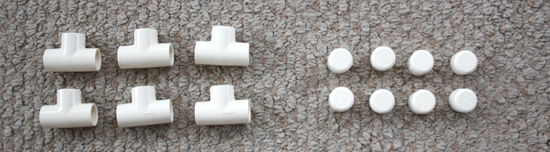
• Approximately two (2) feet of 1/2-inch CPVC pipe
• 1/2-inch CPVC pipe fittings: 6 TEES and 8 END CAPS (Click here for a list of our favorite PVC suppliers.)
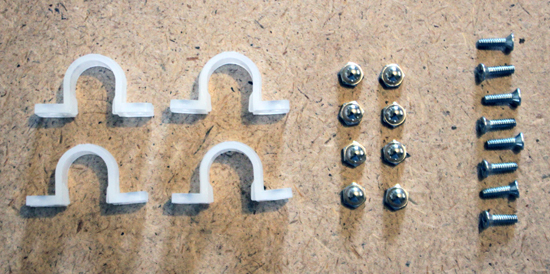
• Eight (8) flat-head Phillips machine screws – size #6 (32×1/2)
• Eight (8) acorn nuts – size #6 (32×1/2)
• Four (4) plastic 1/2-inch tubing straps (made to fit 1/2-inch CPVC pipe)
Tools & Supplies Needed
• Small PVC pipe cutting tool
• Needle nose pliers
• Phillips screwdriver
• Pencil or pen
• Measuring tape
• Fabric scissors
• Awl, hole punch or drill & 3/32 drill bit (My preference is a Crop-A-Dile II)
• Contact cement (such as Weldwood Contact Cement) or PVC cement (such as Oatey Regular Clear PVC Cement)
• Optional: Sandpaper, spray paint for plastic (such as Krylon Fusion for Plastic or Rust-Oleum Painter’s Touch 2x Ultra Cover Paint+Primer) and newspaper, plastic sheeting or other ground cover for protecting the area in which you paint.
Tips before you begin…
• Read through all of the instructions so you know what to expect.
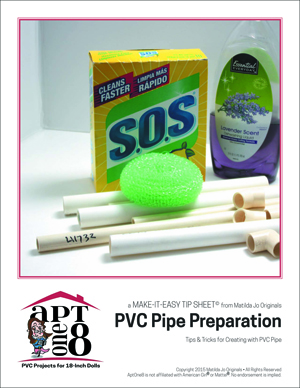
• Download our free Make-It Easy Tip Sheet: PVC Pipe Preparation for tips & tricks when preparing PVC pipe for use in your project.
• Read and follow manufacturer’s instructions for the specific materials you choose to use, including following all safety precautions.
Instructions
Part One – Construct Your Table Base
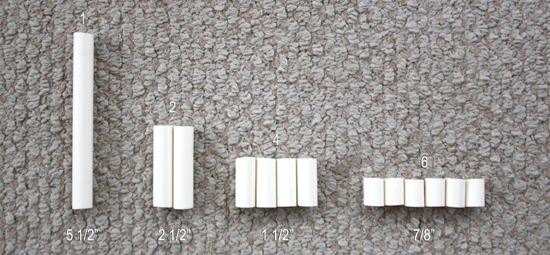
1. Clean your pipe and fittings. Remove marks and/or sand, if desired. (See PVC Pipe Preparation Tips & Tricks) Measure, mark and cut the CPVC pipe into the following lengths and quantities:
- 7/8 inch – Cut 6
- 1 1/2 inches – Cut 4
- 2 1/2 inches – Cut 2
- 5 1/2 inches – Cut 1
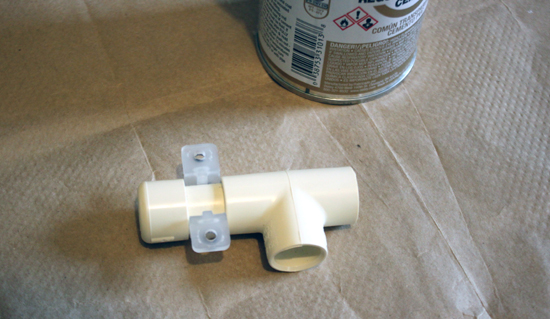
2. Connect the following pipes and fittings in the order listed to create a TABLE FOOT: END CAP + 7/8-inch PIPE + TEE + 7/8-inch PIPE + END CAP. (Make sure your pipes and fittings are pressed all the way together so that the pipe is not visible at all.)
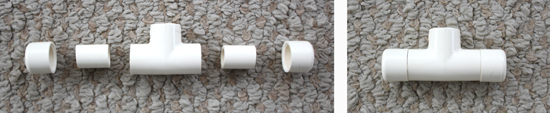
3. Repeat to create a total of two TABLE FEET. 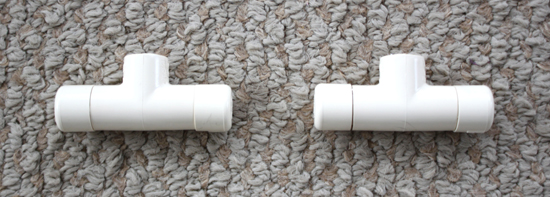
4. Connect the following pipes and fittings in the order listed to create a TABLE SUPPORT: END CAP + 1 1/2-inch PIPE + TEE + 1 1/2-inch PIPE + END CAP. 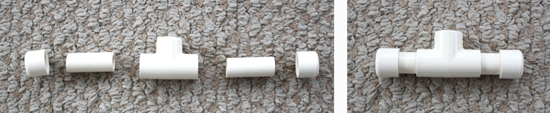
5. Repeat to create a total of two TABLE SUPPORTS. 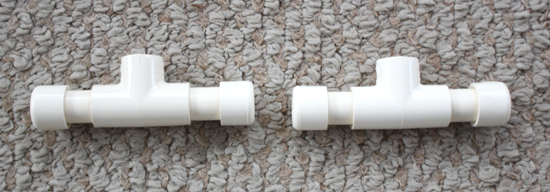
6. Attach a TABLE SUPPORT to one end of a 2 1/2-inch PIPE. Attach the end of a TEE to the other end of that pipe. Use a 7/8-inch PIPE to attach a TABLE FOOT to the remaining end of the TEE. Turn the TEE so the center opening faces straight up when the rest of the piece is flat on the table. You have now created a TABLE LEG. 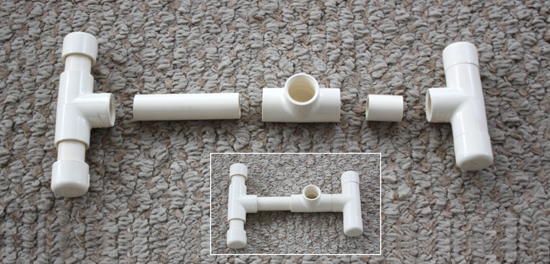
7. Repeat to create a total of two TABLE LEGS. 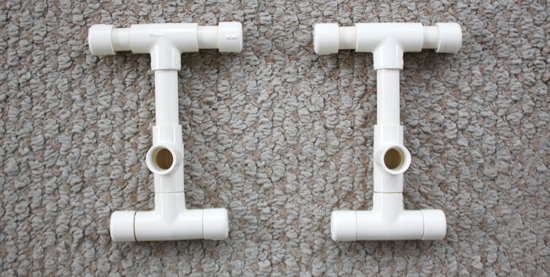
8. Connect the two TABLE LEGS using a 5 1/2-inch PIPE so that the two TABLE LEGS are mirror images of one another. (You may wish to cut this connecting pipe shorter or longer than 5 1/2 inches if you have chosen a frame size other than the sizes recommended.) 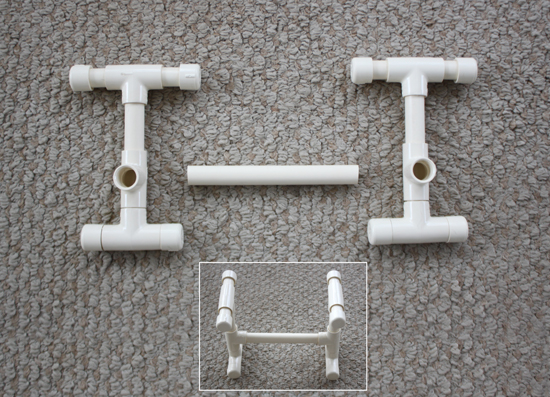
9. If desired, you may now disassemble your frame and re-assemble the parts, gluing them together with PVC cement or contact cement as you go. (Keep in mind that PVC cement sets up extremely quickly, so unless you feel very confident that you can get the parts together correctly as you proceed, you may wish to use a slower-setting adhesive, such as contact cement.) 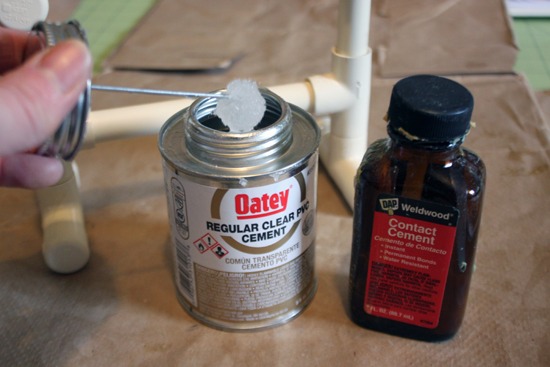
TIP: As you glue the TABLE SUPPORTS, snap a tubing strap into the open space on the pipe before gluing on the END CAP to make sure the strap will fit correctly.
10. Allow the glue to dry completely. If desired, you may now spray paint your frame using a paint marked as suitable for plastic. 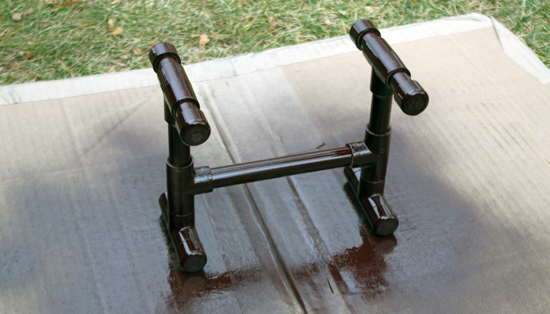
Be sure to allow your paint to dry completely before proceeding. Your table frame is complete!
Part Two – Prepare Your Table Top & Assemble Your Table
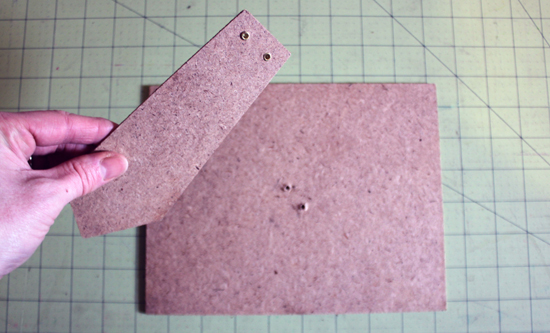
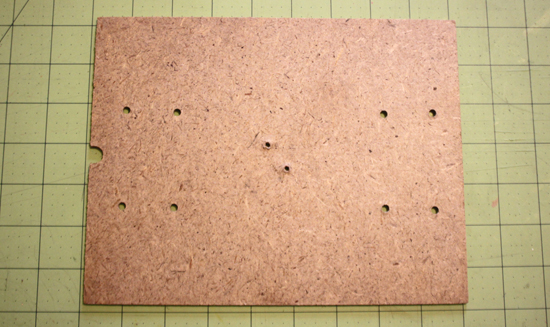
1. Remove the cardboard or chipboard backboard from your frame. Remove any stands, clips or other protrusions attached to the backboard. Save the paper insert that comes with the frame for later use. 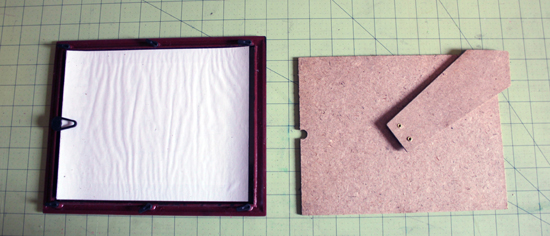
2. Attach a tubing strap to each open space on the top of your table frame. Turn the clips so the flat part is at the top, as shown. 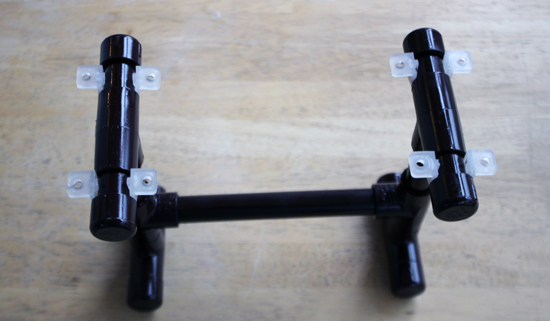
3. Place the frame backboard on your table with the outside of the frame backboard facing up. Lay the table frame on top of the frame backboard, strap side down, and center it front to back and left to right. 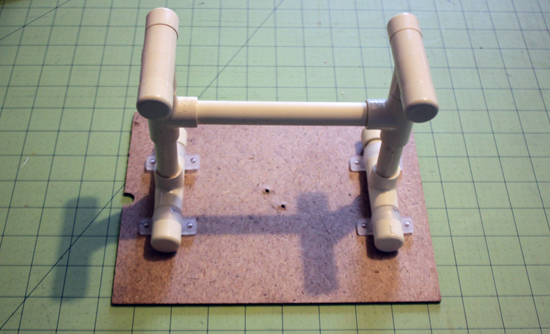
4. Use a pencil or pen to mark the position of each of the holes in the tubing straps. 
5. Using your chosen hole punching tool, punch a hole at each of the marked positions on the backboard. TIP: Make a test hole in a scrap piece of cardboard first to make sure your hole isn’t too small for your screws to go through … or so big that the head goes all the way through the hole. 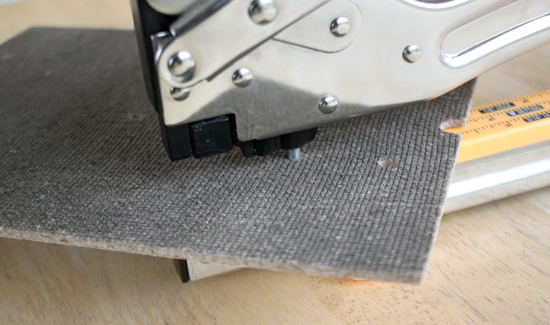
6. Insert a screw from the inside of the backboard through each hole. 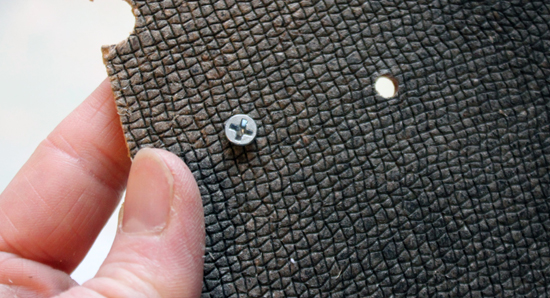
7. Loosely attach an acorn nut to the end of the screw on the opposite side of the backboard to keep the screw from falling out as you proceed. 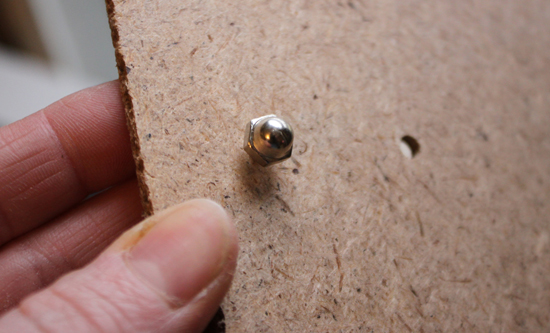
8. Once you’ve inserted all eight screws, place the backboard on your table, acorn nut side up. 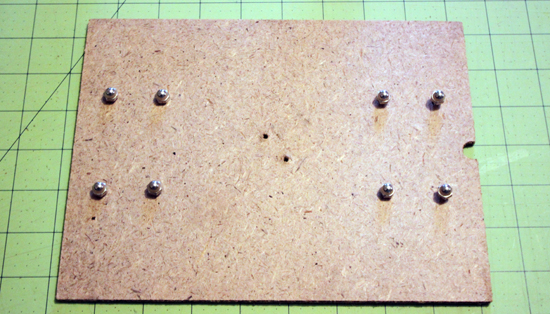
9. Remove the acorn nuts. 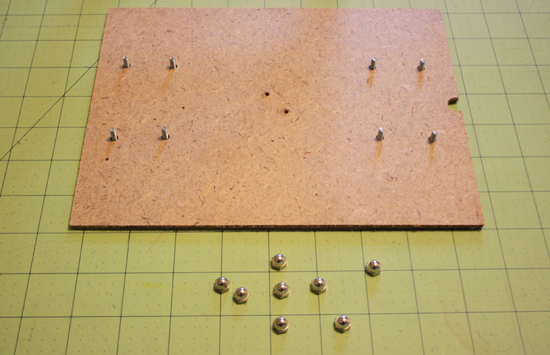
10. Place the table frame on your backboard, slipping each tubing strap over the protruding screws. Make sure each tubing strap is pushed down securely against the backboard. 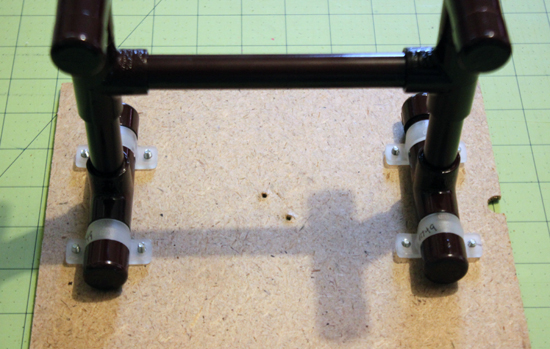
11. Screw the acorn nuts back onto the screw posts, tightening them as much as you can with your fingers. 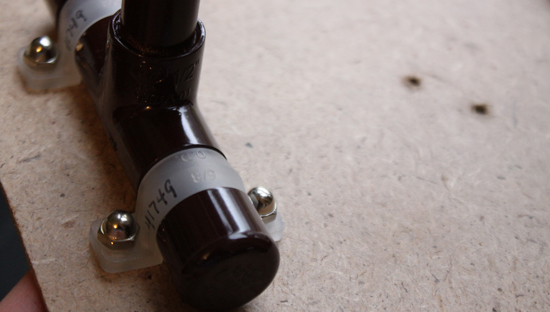
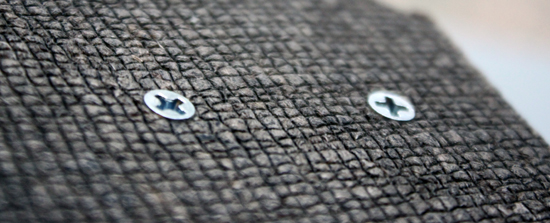
12. Once all of the acorn nuts have been replaced, pick up the table and lay it on its side. Tighten the screws and nuts further by placing a screwdriver in the head of each screw and holding it there while tightening the nut with your fingers and/or needle nose pliers. The head of the screw should be flat against the backboard when you are finished so it doesn’t interfere with the fabric or paper that you will be placing in the frame. 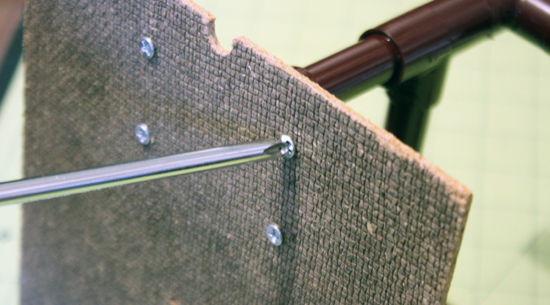
13. Using the paper insert that comes with the frame as a pattern, pin and cut a piece of fabric to decorate your table top. 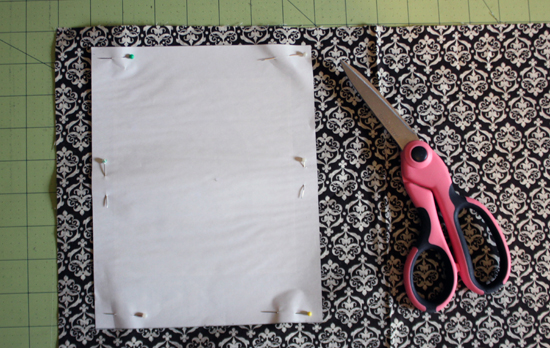
14. Use an iron to press your fabric piece, if needed. Place your fabric face down on the frame’s clear plastic or glass cover, just as you would for a photograph. 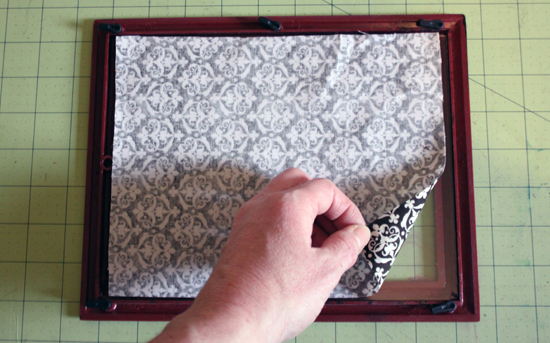
15. Slide or place the frame backboard on the frame, adjusting clips (if your frame has them) to hold the backboard in place. 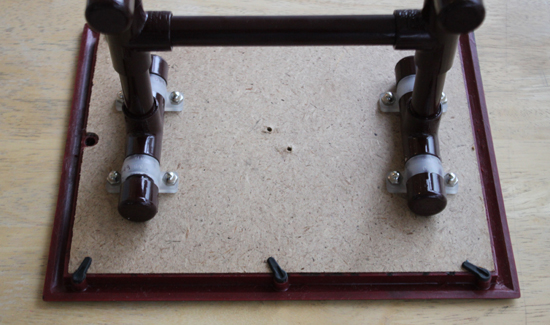
16. Flip the frame over and your table is ready for use! 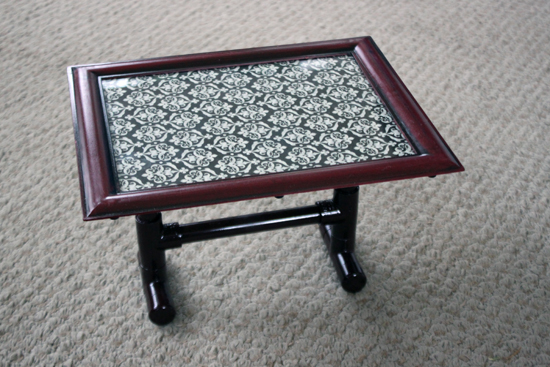
Permission to Get Creative …
- If your chosen fabric is too thick for the frame or you just want something a little different, try scanning the fabric with a flatbed scanner. Print your image on cardstock or photo paper, crop it to the size you need and use your “photo” in your table frame!
- Get even more creative by adding miniature photos, collage clippings or other fun images to your framed fabric or print!
- Enjoy thrift store shopping? Check your favorite shop for gently used (and cheap!) frames … and while you’re there, check out the clothing. Many times you can find a cute shirt or skirts perfect for cutting apart and upcycling!

Need some other furniture to go with your fancy new table? Check out our AptOne8 PVC doll furniture plans…
Matilda’s Closet and AptOne8 are not affiliated with American Girl® or Mattel®. No endorsement is implied.
0 Comments
Trackbacks/Pingbacks