
You find (or design!) a great pattern, spend hours choosing the perfect fabric and trim … and even more time sewing up your creation. Next comes finding the perfect props and accessories, then setting up a realistic scene to show off all your hard work. But then you take the photo and … ugh. Just not what you had envisioned. Sometimes all it takes are a few easy tweaks to make your so-so photos into images worthy of the oohs and aahs all your hard work deserves!
Five Tips for Improving Your Doll Photos
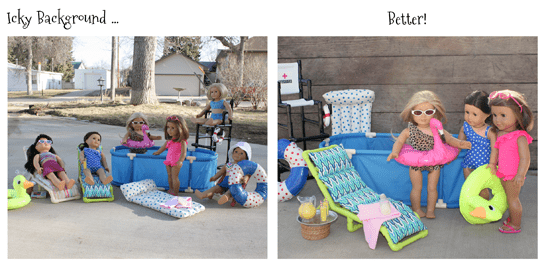 1. Pay attention to the background. If your background is cluttered with things that have nothing to do with your scene, those things can steal the attention from your main subject. Getting rid of the clutter or choosing a setting more complimentary to your subject can mean the difference between a so-so photo and one that gets rave reviews. Also, when it comes to dolls, the scale of the items in your background is very important. Pay attention to things like rocks, bricks, vehicles, furniture and other items that will give away the fact that your subject is really a little doll living in a human-sized world.
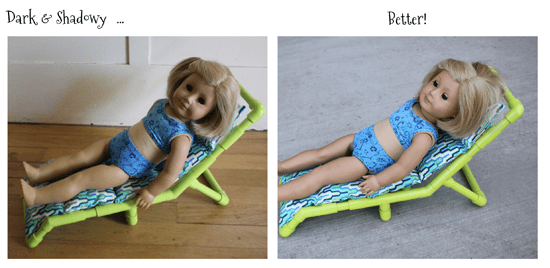 2. Go outside. Lighting can make or break a photo… and natural light is nearly always preferable to artificial light. Whenever possible, shoot your photos outside… or if you have one, in a room that is well-lit by natural light. Pay attention to shadows, too. Oftentimes a slightly overcast day is better for shooting photos than a bright, sunny one.
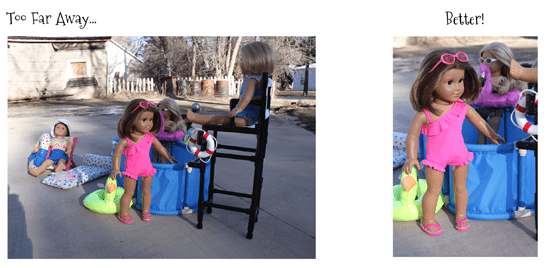 3. Get up close and personal. It’s a natural tendency of beginning photographers to stand too far back from their subject. This can allow your background or other details to overpower your main focus – or worse yet, make it hard to see all the great details in the item you want featured, such as that doll’s gorgeous outfit you spent hours laboring over. Your photos will feel more personal and lifelike if you get closer, either when you take the shot or by cropping your image afterward with your preferred photo-editing software.
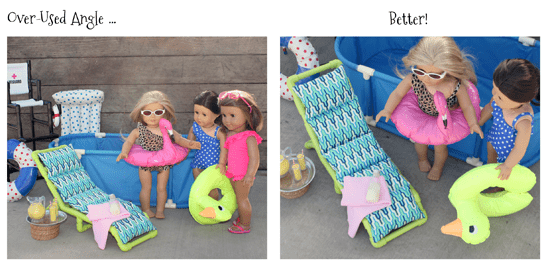 4. Try a different angle. Instead of always centering the doll in the photo and shooting her directly from the front, try putting her to one side or the other of your frame. Get up on a step-ladder and shoot from above. Or crouch down and shoot below her eye-level. Stand to one side, then the other. Play around with different angles and you might be pleasantly surprised with the results.

5. Take time to focus. It doesn’t matter how well you compose your photo if it’s blurry. The nice thing about dolls is they don’t fidget and there’s no need to coax a smile. 🙂 Once you set up your scene, take the time to really slow down, take a deep breath and focus your image. Shaky hand? Use a tripod and if your camera has one, make sure the lens stabilizer is turned on.
Have a doll photo tip?
Please share in the comments below!
Thank you for these helpful tips and reminders, Kristin. I love sewing you patterns for our shop, #Tiny Trousseau on Etsy.
You’re welcome Lynn! I’ll have to check out your shop… glad to hear you like my patterns! 🙂